Google Slides / PowerPoint presentations
Each lesson is accessible online and can be run in the classroom if you share the screen of your internet-connected computer with the students. At the start of each lesson on the dedicated page on the website fantastique.school you will be able to use Google Slides as the preferred way to present your lesson. You can enter the “Full Screen” mode and “Open Speakers notes”.
Full Screen mode will display the presentation in full screen. To change slides, use the arrow keys on your keyboard or click the arrows at the bottom of the presentation.
![]()
Speaker notes are very useful when giving presentations. These help you highlight the key concepts that you want to talk about in each slide, and they’re not visible for your audience. We strongly recommend using the Speaker notes for all lessons as they give details and explanations on all activities.
![]()
Alternatively each lesson is downloadable as a PowerPoint Presentation: you just have to click on the button “DOWNLOAD PPT” at the bottom of each lesson. The Powerpoint presentation has all the same functionality as the Google Slides presentation. However we recommend that you use Google Slides as the lessons have been designed with this presentation program in mind, with a better integration of audio and video clips.

Additional documents to print
There are additional documents to print for the two Primary lessons: these are materials for you to print and distribute to your students. You will find a button “ADDITIONAL DOCUMENTS TO PRINT” at the bottom of the page for each lesson: it will direct you to a folder where you can find the ready-to-print PDF. You should print as many as you need.

How many sessions should you dedicate for each lesson?
It’s entirely up to you! There is a lot of content in each lesson, particularly the Primary lessons which teachers might deliver over two or even three sessions. Teachers may choose to omit certain sections within each lesson: it’s for your convenience.
For example, in the Secondary lesson “Berlioz the Orchestrator” you can spread the lesson over two sessions or shorten it to just one lesson by using the example melodies instead of students recording their own
.
Specifics
Primary Lesson One – Berlioz the Orchestrator
In the “Additional documents to print” folder there are several documents for you to print:
. The Letter from Berlioz in relation to Slide 2 in the presentation: print just one copy and put it in an envelope. You or a designated child will read the letter to the class.
. The picture of the Cello in relation to Slide 3 in the presentation: print just one copy and put it in the envelope together with the letter from Berlioz.
. Printable sheets of instruments in relation to Slide 6 in the presentation. Those sheets have to be cut up so that each child can be given one picture. It is important to give the pictures out in pairs so that everyone in the class will be able to match their picture with another exactly the same, but ensure they are mixed up so no adjacent children have the same picture.
- Five instruments on the PDF “Brass instruments to cut out”
- Five instruments on the PDF “Strings instruments to cut out”
- Five instruments on the PDF “Woodwind instruments to cut out”
As an example, for a class with 30 children you would need to print x2 sheets for each PDF, in order to have 30 cut out instruments in total (one instrument for each child)
NB: there are no “Percussion instruments” to print
. In relation to Slide 7 in the presentation, the Brass, Strings and Woodwind sheets: print just a few of each so you can organise the classroom in to different “desks” whereby a “desk” is assigned to a family of instruments. Children will have to use the pictures to search for their ‘instrument partner’ and the desk for their family of instruments.
. The Layout of an Orchestra in relation to Slides 18 to 21 in the presentation. This PDF should be printed on an A3 sheet of paper. There should be one blank ‘orchestra map’ for each group, where children work together placing their instruments (the same ones that you distributed to them earlier) in the correct place on their ‘orchestra map’.
As an example, for a class with 30 children you should print x2 A3 ‘orchestra maps’
. Specifics and details for “Weaving Berlioz’s Orchestra” Activity in relation to Slide 22: just one sheet to print, with more details for this activity.
. Sheet to print for the “Follow Me Game” activity in relation to Slide 24: this PDF should be printed once or twice, depending on the number of children in your classroom.
You will have to cut out each statement and distribute them to children so each child has a strip with two connecting statements. Some children may have two. All the slips should be given out.
Some activities in the Berlioz the Orchestrator lesson have accompanying tutorial videos to explain the activity:
. Tutorial video for the “Weaving Berlioz’s Orchestra” activity (slide 22)
. Tutorial video for the “Follow Me” game (Slide 24)
Primary Lesson Two – Berlioz the Storyteller
In the “Additional documents to print” folder there are several documents for you to print:
. Harriet Smithson portrait painting in relation to Slide 2: just one copy to print and show to the children at the start of the lesson
. Dynamics to cut out in relation to Slide 9: give one of these dynamic markings to each child.
Ask the children to create a sound, using any part of their body, or their voice that might represent their dynamic. Invite them to stand at the front of the class in a line and see if the class agree their dynamic is in the right order in comparison with their peers. If not shuffle the children around until the sounds range in order from ppp to fff. Look at the abbreviations that are often used in music to indicate a dynamic. Can the children ‘label’ those at the front with a post-it to show what dynamic they are creating?
. Sheet to print for the “Graphic Score” activity in relation to Slide 13 in the presentation, and additional information (Explanations) for this activity.
This activity could form the basis of a whole lesson, following input about Berlioz as a storyteller and exploration of his music. Give each child a strip of good quality paper that has been folded into five squares. Play the children a short clip of each movement using the sound buttons on the PowerPoint and ask children to use wax crayons or permanent marker pens to draw a symbol, mark or pattern on each square to indicate each movement. These are not designed to be representational – for example don’t encourage drawing shepherds for the third movement. Children might instead recognise the wavy, melancholy calmness of the opening of the third movement, the spiky, jagged nature of the fifth movement or the swirling, circular movement of the second.
Some activities in the Berlioz the Orchestrator lesson have accompanying tutorial videos to explain the activity:
. Tutorial video for the “Graphic Score” activity (slide 13)
. Tutorial video for the “Mark the Beat” activity (slide 18)
Secondary Lesson one – Berlioz the Composer
If students don’t quite get on to composing their own fully developed melody, they can compose a full piece as a class to great effect.
Secondary Lesson two – Berlioz the orchestrator
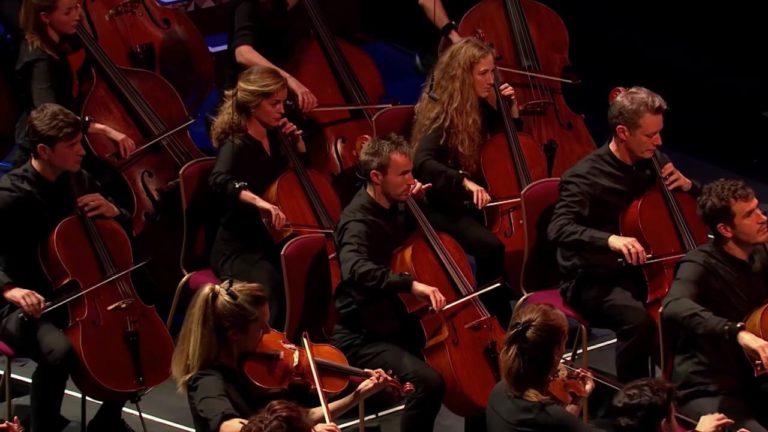
We expect students to explore the instruments of the orchestra despite not having access to real tubas and harps in school!
With regards to music software required in this lesson, you can choose between Garageband, Soundtrap, Cubase, Sibelius, Noteflight and Ableton Live.
For each music software we have developed two slides to explain the activity: Recording your melody (1) and Orchestrating your melody (2)
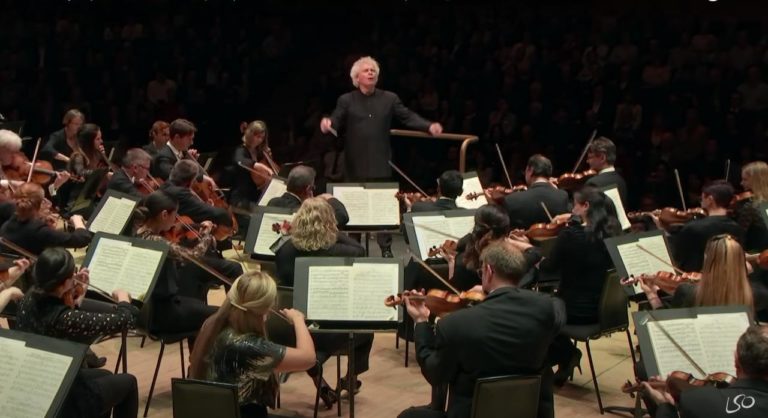
Secondary Lesson three – Berlioz the conductor
We believe that most students have heard of a conductor before, but probably most of them have no idea what all the gestures mean. The idea here is to demystify a skill to make it really accessible for everyone. We hope that students enjoy coming to the front of the class and conducting the group. You should have a lot of volunteers!
Unlike the previous two Secondary lessons, this one might be a little short. You might want to add an extra video of Mr Bean conducting, just for fun!
You might also add a final reflection activity at the end, it’s entirely up to you.
Assessments
Since the Fantastique! for Schools music lessons are used by teachers to cover the National Curriculum (as well as being inspired by Berlioz – of course), we thought it was important to help you with assessment of children and see which parts of the music curriculum our lessons cover.
To this end we have created some guidance for teachers in line with what we know is used in schools. Assessment sheets for Primary School teachers can be found here. These assessment sheets will enable you to record which children are secure in the learning objectives of the lessons, exceeding the objectives or need further support to meet them.
The teacher should acknowledge whether the child is working towards, at expected levels or beyond (greater depth) and their initials should be recorded in the relevant column). The children do not need to know they are being assessed.
For Primary schools we identified five areas for assessment:
- Assessment: Timbre – Instrument recognition. Can children independently sort instruments into wind, string, and brass sections and place them on an orchestra layout mat? Can they describe how the sound is made by different instruments e.g. blown, bowed, plucked, hit and explain how this creates different timbres of sound.
- Assessment: Duration. Can the children internalise a 2/2 and 3/8 pulse? Can they demonstrate this by ‘conducting’ the music and or using chalk to mark make in time with the music?
- Assessment: Pitch. Can children differentiate between an echo and a call and response? Can they demonstrate this by using 4 given notes to both echo a short melodic motif and compose a music ‘answer’ to a short musical call using the same given four notes? (for example: C, D, F, G).
- Assessment: Chronology. Can the children place Berlioz in the context of musical history understanding and briefly give an example of a piece of music that came before him and one that has been composed since? Can they explain some of the influences that might have been a factor in the composition of his music? (e.g. his friends, his own personal background, social influences, historical events, his teachers).
- Assessment: Understanding of Symphonie Fantastique. Can the children recognise that music can sometimes paint pictures, create atmosphere and conjure feelings? Can they listen with detail and describe the different movements using relevant vocabulary including the interrelated dimensions of music (pitch, duration, structure, tempo, timbre, dynamics, texture).